This method of installation is the simplest available. The assumption is that the you have a Windows installation taking up all the space on your drive, and you would like to resize and re-partition your drive to allow a BackTrack install alongside your Windows. BACK UP YOUR WINDOWS INSTALLATION FIRST.

Download our Android App Best Computer Guide

Step 2: Double click the “sh” script on the desktop, or run the command “ubiquity” in console.
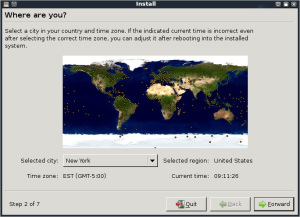
Step 3: Select your geographical location and click “forward”. Same for the Keyboard layout.
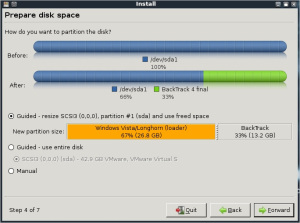
Step 4: The next screen allows you to configure the partitioning layout. The assumption is that we are resizing the Windows 7 partition and installing BackTrack on the newly made space.
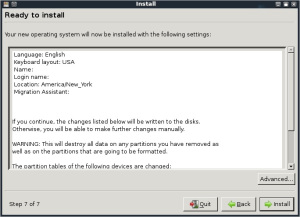
Step 5: Accept the installation summary and client “Install”. Allow the installation to run and complete. Restart when done.
Step 6: Grub should allow you to boot both into BackTrack and Windows.
Step 8: Fix the framebuffer splash by typing “fix-splash” ( or “fix-splash800″ if you wish a 800×600 framebuffer), reboot.
enjoy!!!!
Download our Android App Best Computer Guide
Step 1: Boot BackTrack on the machine to be installed. Once booted, type in “startx” to get to the KDE graphical interface.
Step 2: Double click the “sh” script on the desktop, or run the command “ubiquity” in console.
Step 3: Select your geographical location and click “forward”. Same for the Keyboard layout.
Step 4: The next screen allows you to configure the partitioning layout. The assumption is that we are resizing the Windows 7 partition and installing BackTrack on the newly made space.
Step 5: Accept the installation summary and client “Install”. Allow the installation to run and complete. Restart when done.
Step 6: Grub should allow you to boot both into BackTrack and Windows.
Step 7: Log into BackTrack with the default username and password root / toor.Change root password.
Step 8: Fix the framebuffer splash by typing “fix-splash” ( or “fix-splash800″ if you wish a 800×600 framebuffer), reboot.
enjoy!!!!
No comments:
Post a Comment