How to host Website on your own PC


Your website using your own home PC , hosting form your PC will give you little bit experience of how hosting services work.You can try it for small website or personal work.To run your PC as server there are lot of software but top most popular is WAMP server and XAMP server.Here i’m using WAMP server.


Download Best Computer Guide Android App


Why you should use your PC for hosting???

  • Free of cost
  • Total over control in your hand
  • You can use it for fun(for experiments).
Why you should not use your PC for hosting???

  • Hosting means your PC is running 24×7 non-stop.If somehow your PC is shutdown or powered off then your website is offline from all over internet.
  • Running your PC 24×7 for website is not a good idea.
  • If your PC got corrupted then your website will too.
  • There is no surety that your ISP will providing 24×7 internet without disconnection and same applicable for power .

So,Let’s start our hosting :

Here I’m using WAMP server , you can download latest version form here.and install it.after then add the security exception for Apache in Windows Firewall.

Now after installation :

1. Go to your browser and type localhost .Just only to make sure that you properly install and configured WAMP.(If localhostopens WAMP homepage in your browser it means you are ready to rock with your PC).

2. Now click on WAMP icon placed in taskbar like this and then click on www directory.


3. Copy your website content and pages in www directory.Example :I made a webpage and copied it in www directory.

4. Now go back to your browser and type localhost/mywebsite(replace mywebsite with your website page)in URL bar.You see your website like this :


Congrats your website is up and running.

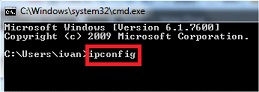
But this is only works on LAN .If you want to host it on WAN then you need a static ip(i.e. A static IP address is a number (in the form of a dotted quad) that is assigned to a computer by an Internet service provider (ISP) to be its permanent address on the Internet.).Use your IP in URL bar instead of localhost then it will works on WAN means you can access your website anywhere in the world.

Troubleshooting :

  • Make sure you installed WAMP correctly
  • If you are unable to see localhost page then just turn off your firewall and then try.
  • If your website is not responding then please double check URL (discussed in step 4)

How to Create a SMTP Server on your Computer


Before you delve into the process of creating an SMTP server for your small business, consider whether it requires a dedicated mail server for security, or if you can configure your messages to bounce off your ISP’s server instead. 


Download Best Computer Guide Android App


SMTPs allow inter office mailing and secure internal mail, and also provide secure external mail as long as they don’t need to use your ISP’s SMTP as a relay.


IIS SMTP Server Setup

Step 1: Open up the Control Panel and click “Programs,” or “Programs and Features” if you’re in the Classic view.

Step 2: Click “Turn Windows Features On or Off,” which is located in the left pane if you’re in Classic view. Click “Allow” if you get any security warnings.

Step 3: Expand “Internet Information Services” and make sure that the “SMTP Server” is installed. If not, check the box next to it and restart as necessary.

Step 4: Press the Windows key and “R” to open the Run menu. Type “inetmgr” and press “Enter” to open the IIS Manager.

Step 5: Right-click the “Default SMTP Virtual Server” and select “New,” then “Virtual Server.”

Step 6: Input your SMTP settings within the New Virtual Server Wizard to configure the server.

Step 7: Configure your email clients — like Outlook Express or Thunderbird — to use the new SMTP server. Email clients will route to your SMTP server, and your server will route that mail to external addresses.


HMail Server Setup

Step 1: Download hMail Server. Double-click the”hMailServer-(version)-(build).exe” file and follow the install dialogs.

Step 2: Choose between a compact MySQL (built-in) database and MySQL (or MSSQL, PostgreSQL, external) database and click “Next.” If you already have a database installed, you can choose to use it for the mail server or use the bundled compact MySQL that comes with hMailServer.

Step 3: Enter a master password for an administrator account. Remember this password to make future changes to your server.

Step 4: Finish the installation and start hMail Server, then click on the Administrator account and press “Connect.”

Step 5: Click the “Add Domain” button in the” hMailServer Administrator – [localhost]” window and type in your domain name, such as “mydomain.com.” Click “Save.”

Step 6: Click the “Accounts” folder under your domain. Click the “Add…” button on the right and type in the account name. Set your password, then click “Save” to create the new account.

Step 7: Click on “Settings,” “Protocols,” then “SMTP” in the tree to the left and choose the “Delivery of E-mail” tab. Type in your local host name, which should be something like “mail.mydomain.com.”

Step 8: Click on the box labeled “Remote Host Name” under “SMTP Relayer” and type in your relayer if you need one. To test this, press the Windows key and “R,” type “cmd” and press “Enter.” In the command line, type “telnet mail.hmailserver.com 25” and press “Enter” to see if port 25 is open. If the command line returns “Could not open connection to the host…” then check with your ISP about opening port 25, or find out the ports that your ISP usesfor SMTP (usually smtp.myisp.net:port) and enter that information into the SMTP Relayer. Otherwise, leave this area blank. Do not input”localhost” or “127.0.0.1” as the SMTP Relayer.

Step 9: Open another command prompt or use the same one from before and type “nslookup -type=mx mydomain.com” then press “Enter.” A line like this should show up with the rest of the replies:”Non-authoritative answer: mydomain.com MX preference = 10, mail exchanger = mail.mydomain.com” If you don’t see a line similar to the above, then contact your domain host and ask to set up an MX record for your domain.

Step 10: Set your IP ranges, anti-spam and anti-virus options, new accounts and other configuration settings as required.

Using Your ISP’s SMTP

Step 1: Check your ISP’s site for its SMTP information. Look for something similar to “mail.myisp.net:465” and any additional settings. Most ISPs give configuration instructions for common email clients, like Thunderbird and Outlook Express.

Step 2: Open your email program and go to your Account Settings or Settings. For example, in Thunderbird, click on “Tools,” then “Account Settings.”

Step 3: Find your SMTP or “Server Settings” and input the information from your ISP. In Thunderbird, this is the “Server Name” and “Port” under”Server Settings,” and “Outgoing Server (SMTP).”

Step 4: Click “OK” or “Apply” to save your changes.
Done. Enjoy

How to Manage your Google Web History


As most of you already know, Google keeps a tab on pretty much everything you do on a Google site, provided that you signed in on any one of these websites. Everything you do is recorded, and can be used against you in the future. Search data can reveal particularly sensitive information about you, such as facts about your location, interests, age, religious views, and so on. You can, however, choose to not be so vulnerable, and can remove all of your Google web history to protect yourself from an unforeseen eventuality.


Download Best Computer Guide Android App


In this post, I’ll show you how to remove your entire Google web history.

Before we begin, please note that any data you remove will be deleted permanently. Google keeps a lot of useful information that helps you find what you’re looking for faster. It gives you quick access to webpages you’ve visited in the past, and even lets you know in search results which pages you’ve visited, and when. This information can be useful if you’re a power user, and like to get things done quickly.


But if you still want, you can go ahead and erase your entire web history. You can also pick and choose individual items to remove, so that you won’t lose everything.

Delete your Google Web History
Follow these steps to partially or completely.

Step 1: Visit your Google History page at https://www.google.com/history. Alternatively, you can click the gear icon on the upper right corner of a search results page, and then go to Search history.

Step 2: Click on the gear icon again, and then go to Settings.


Step 3: Click on the delete all link. You’ll be prompted for a confirmation. Click on Delete all again, and your entire search history is gone!


Step 4 (optional): Click on the Turn off button on the Settings page to stop Google from storing your history again.

If you don’t want to delete your entire history, you can select individual items from the History main page, and delete them. This, by no means, implies that Google has nothing more to do with your data. They still keep some of your information on their servers for auditing and other such purposes. But at least your personal data is off the line now, and isn’t susceptible to leaking out into the wrong hands.

Best Computer Guide : Android App for Shortcut Keys

Hey guys,
Download my first Android App "Best Computer Guide" from Play Store, from below :


Download Best Computer Guide Android App


This App is mainly for Keyboard Shortcut Keys from all fields including Windows, Linux, MacOS, Ubuntu, Unix and many more..

In coming Updates, i'll add more features, so stay tuned with us.....

How to Remotely Shutdown any System Connected in LAN

This is a nice trick to Shutdown or restart any computer connected in a LAN. This trick is so simple and you don’t need any 3rd party softwares.This trick can be done in any LAN networks such as at schools, offices etc.All you need is the access to any of the system connected in LAN.You can really fool your friends by shutting down their system without their knowledge.Now lets start our trick,I am giving you step by step instructions,just folllow it .


STEPS :
1) Open RUN ( window + r ) and type cmd

2) In your command prompt window type the keyword given below exactly.

shutdown -i

If eveything goes right a new window as shown below will be opened


3) Now click add button and add IP address or name of the system that you are going to shutdown or restart as shown below.


If don’t know the IP address of the system just run nslookup in command prompt ,You will get the ip details of the systems connected on LAN network

4) After adding the IP address just change the settings as shown below.If you want to warn the user before shutting down their system just select that option and set time interval for shutting down their system.If you want to give a custom message to user before shutting down their system you can type it in comment field or else leave blank.


Thats it you are done…..The system with ip address that you added, will shutdown by the time you provided with the warning message if you given any..

If found anything useful in this article please pass your comments ……all your feedbacks are precious………

What is Doxing and How it is done

In the modern world, Internet has become a wonderful place to gain knowledge, exchange ideas, share information, make new friends and whatnot. Even though, you can do all of this by remaining anonymous behind your monitor, your real life identity and personal details can still be at the risk of falling into the hands of strangers. This is where the term “doxing” comes into play!


What is Doxing?

Doxing simply refers to the process of gathering or deducing other people’s information such as name, age, email, address, telephone number, photographs etc. using publicly available sources such as the Internet. In other words, doxing is the act of using the Internet to search for personal details about a person.

Doxing is done by initially taking a piece of information (such as “name” or “email address”) and keeping it as a base to find out other possible details about the person. The term “doxing” is derived from the word “document tracing” which means to retrieve documents about a particular person or company in order to learn more about them.


Doxing Techniques:

Today, Internet has grown to such a size that it contains almost any information that you’ve ever imagined! All you’ve to do is use the right techniques to search for what you want. Here is a list of doxing techniques that are most commonly used by Internet geeks and ethical hackers:


Using Google:

Google is undoubtedly a powerful tool that plays a key role in doxing. Since Google indexes almost anything on the Internet (sometimes even the private information), it is possible to dox for details such as email ID, address, phone numbers and photographs of a person or company. Once you obtain the search results for your query, carefully examine the description part which in most cases contain the piece of information that you are looking for.


Social Networking Websites:

As most Internet users are found to be active on social media, social networking sites such as Facebook and LinkedIn provide a virtual goldmine of information necessary to perform doxing. As most users are unaware of online security issues, they have weak privacy settings on their profile. This makes it easy for the attackers to gain access to personal information such as photographs, real names, location, job, partner’s name etc.


Reverse Cell Phone LookUp:

A “Reverse Cell Phone Lookup” is simply a process of finding someone’s personal details such as name, age, address and related information by using their cell phone number and vice versa. There are many online services out there such as cell phone registry that provide access to the personal details about a given person based on his/her phone, name and email ID.


Whois Searches:

If a person or company has a website (or domain name) associated with them, you can easily perform a “whois search” for their website to obtain personal details such as full name, address, email and phone number. Just visit whois.domaintools.com and enter the domain name for which you want to perform a whois search. It will show up all the details associated with the domain name.


Why Would Anyone Want to Perform Doxing?

Most people perform doxing out of general curiosity about a person or company. However, there are some wicked minds out there who do this for the purpose of blackmailing or taking revenge by exposing the information that they have gathered about the person.


What are the Consequences of Doxing?

It can be slightly irritating and embarrassing when private data fall in the hands of people who are not intended to have access to such information. However, things can go even worse if the doxed information such as a person’s social activities, medical history, sexual preference and other vital bits of information is made public. This can have a serious threat to health, livelihood or relationship of the victim.


Steps to Protect Yourself from Doxing:

The following are some of the most commonly targeted pieces of information that can be easily obtained through doxing:

  • Full name
  • Age, gender and date of birth
  • Location and place of birth
  • Email addresses and username
  • Phone number
  • Social networking profiles, websites and blogs


So, it is always a good practice to keep the above bits of information hidden. Even though it is not possible to do this in all cases, you can still take care to protect as much information as you can from going public. You can consider the following additional tips for further protection:
1. Do not upload personal photographs on web albums such as “Picasa”. Even if you do, make sure that your album is hidden from public and search engines.
2. If you do not intend to show up your profile on search engines, it is a wise choice to make all the Internet profiles private.
3. Maximize the privacy settings of your social network profiles. Make sure that your individual albums and photographs have their privacy settings configured.
4. Do not use the same email address for all you accounts. Instead, create separate email IDs for individual activities such as gaming, forum participation, banking accounts etc.


Is Doxing a Crime?

Doxing is definitely not a crime when used within the ethical standards and no harm is being caused to anyone. However, if doxing is done to cause intentional damage such as harassment, blackmailing or taking revenge it might well be considered an offence.

What to do if your Computer gets Hacked

As the news of several accountants’ computers being hacked by criminal gangs, the security of your computer on Internet is again under scanner. As the use of Internet is increasing, the chances of your computer getting hacked are also increasing dramatically. There is plenty of file sharing and web surfing that is being done, which makes your computer vulnerable for attack. But this article will help you in deciding what steps to take if your computer gets hacked.


How to Find if Your Computer is Hacked?

It is important to know when your computer has been actually hacked and when it is just behaving weird:


  • Sometimes it’s just simple and the hacker may leave some note or warning to prove that your computer is actually hacked.
  • You are not able to access your various mails and social media accounts or at worst you are not able to access your computer.

Steps to Take if Your Computer Gets Hacked:


1. Check the Impact of Damage


After using your computer for some time you would know what type of infection you are facing whether it’s malware, virus, trojan, keylogger (spyware) or anything else. In case a keylogger application is installed, you can use a good antispyware program to remove the infection. However, formatting the hard drive is a better option if the infection is severe. You should try to back-up all the important and confidential files that you may have in your computer before formatting.

2. Damage Control

You should run antivirus programs to determine the extent of damage. Users of Windows OS can run “Malware bytes” which can be found freely and recognises various harmful applications which antivirus cannot. Sophos Mac antivirus is a free application which can be used by Mac users.

3. Removal

After running several scans you will know what is the extent of damage you are facing. After making the list of viruses and malware that have infected your computer, next thing you need to find is what the impact of damage is. For that you must check the details about those viruses and malware programs to know how they rank in terms of damages they can have in your computer. You must carry out the searches from a neutral device which is not hacked and search for removal tools for those malware programs which have infected your computer. Unfortunately, if after several tries you are not able to clean your computer then the only option left is to re-install your operating system.
4. Offline Hacking

This is true that Internet is the most common way to hack a computer, but it is possible that anybody can hack your system using USB devices. The process of removal of the infection is the same in this case as well. The best precaution you can take to avoid such situations is to password protect your computer OS and BIOS. This makes it difficult for anyone to gain access to your computer.


Conclusion:


The best thing that you can do is to protect your computer by using fully updated antivirus and a good firewall. 
It is also wise to have a protection tool for windows registry. To protect your files, you can use encryption tools so as to encrypt the data on your hard disk. 
As there is no 100% fool proof way to prevent hacking it is always better to take precautionary measures.

FB Shortcuts List: You never knew existed in Browsers

I know the fact that almost 90% of you are addicted to Facebook and If you are spending a lot of time on facebook then why not spend it more efficiently.So in this article I am going to give you a nice list of Facebooks shortcuts and this artilcle is meant only for facebook users.


Here is a comprehensive list of facebook Shortcuts for each browser.Learn these shortcuts and have a better experience with firefox

Google Chrome Facebook Shortcuts


Alt+1: View your News Feed

Alt+2: View your own Profile

Alt+3: View pop-up of friend requests

Alt+4: View pop-up of messages

Alt+5: View pop-up of notifications

Alt+6: View Account Settings

Alt+7: View Privacy Settings

Alt+8: View Facebook’s own profile

Alt+9: Read latest Terms of Service agreement.

Alt+?: Search

Alt+m: Compose a new message


If you are using Firefox browser then you also need to press SHIFT along with the above shortcut keys.
Firefox Facebook Shortcuts
Shift+Alt+1: View your News Feed

Shift+Alt+2: View your own Profile

Shift+Alt+3: View pop-up of friend requests

Shift+Alt+4: View pop-up of messages

Shift+Alt+5: View pop-up of notifications

Shift+Alt+6: View Account Settings

Shift+Alt+7: View Privacy Settings

Shift+Alt+8: View Facebook’s own profile

Shift+Alt+9: Read latest Terms of Service agreement.

Shift+Alt+0: Open Facebook Help Center

Shift+Alt+?: Search

Shift+Alt+m: Compose a new message

If you are using Internet Explorer then you you can use the Facebook shortcuts of Google chrome,but you have to press ENTER after each shortcut.


For more cool Shortcuts like this,

Download our Android App Best Computer Guide


Use these shortcuts and have a better experience with Facebook……

Hide IP Address Online To maintain your Privacy

Every computer on the Internet has a unique IP address allotted to it which makes it possible to trace it back to its exact location. Even though the concept of Internet Protocol address has been designed for its transparency and traceability, in some cases this questions the privacy of the Internet user where one would not like to reveal his/her identity to the outside world. Well, if you are one such person who is in search of ways to hide your IP address online, then you are at the right place. 


In this post, I will discuss some of the easy and popular ways to hide your IP address, so that your identity and privacy is kept safe.

One of the most popular and easy ways to hide your IP address online is to use a proxy server.

In simple words, a proxy server is any server that will act as an intermediary between your computer and the Internet. Instead of communicating directly with the websites or Internet resources, here you communicate with the proxy server which then forwards all your requests to the remote server so as to establish a back and forth communication between your computer and the Internet. So, whenever you are hiding behind a proxy, the Internet or the websites you visit will only see the IP address of the proxy server, so that your real IP address is kept hidden.


Types of Web Proxies

Here is a list of different types of web proxies that you can try:


Website Based Proxy Servers:

This is the simplest of all methods. There are many websites on the Internet that provide free and paid proxy service for the users without having to install any piece of software program on their computer. The following are some of the popular websites that offer proxy service:


The above websites provide a field to enter the URL of the target website that you want to visit anonymously. Once you submit, they will establish a connection with the target site and presents you back with the intended page that you are trying to browse. The downside of using these free services is that, some of them will not offer a secured connection (SSL) and you will often be presented with annoying ads and pop-ups during the course of your browsing. However, you can avoid these by becoming a paid user.


Browser Configured Proxy Servers:

There are hundreds of freely available open proxies that can be found on the Internet. You can obtain the IP address of one of those freely available proxy servers and configure your browser to start using them. However, as they are openly available to public, most of them are either bottlenecked or perform too slow on normal conditions.


Program Based Proxy Servers:

A program based proxy server requires you to install a program on your computer and configure its settings. These provide you with an option to start hiding your IP address with just a click of a button. They automatically connect your computer to a private high speed anonymous proxy server to provide best performance. You also have the option to choose proxies based on location such as countries. The advantage of using this type of proxy is that, it is not limited to a single browser. That means, your computer’s entire web traffic is routed through the proxy, there by guaranteeing you with a highest level of privacy.

Most of these programs come with a free trial where you are required to pay once the trial period expires. The following are some of the popular program based web proxies:


VPN Services:

VPN services provide reliable ways not only to hide your IP address but also to protect your data and identity over the Internet. Here are a few examples of VPN services that you can try:


These are some ways through which you can Protect your Online Privacy by Hiding your IP...

How to Disable Right Click on Desktop


If you want to disable your right click option in desktop,then there is a simple trick to do this editing your registry.This is so simple all you have to do is to create a new key,Ok lets start our trick.


1. Open Run ( window + r ) and type regedit.

2. Registry editor window will be opened and browse to the following key


HKEY_CURRENT_USER\Software\Microsoft\Windows\Curre ntVersion\Policies\Explorer


3. Then in right side panel, right click to create a new DWORD value with the name

NoViewContextMenu (it is case sensitive), then assign number 1 in value data box.


4. Then exit the registry and restart your computer to effect the changes.
and that's it, you are done. Now you can't right click on the desktop.


Hope you like this tutorial, Feel free to for any help in comments...

How to Create a Bootable USB Drive without using any Software


To create a bootable USB drive manually, we will use the Command Prompt as a Windows default program. Here are step by step to create a bootable USB drive as the Windows installation media.


1. Insert your USB flash drive to your running computer. As the first step, we need to run Command Prompt as administrator. To do this, we need to find cmd by typing ‘cmd‘ in the search box on Windows Start Menu. After search result for ‘cmd‘ appears, right click on it and select “Run as administrator“.

2. Type ‘diskpart‘ on Command Prompt (without quotes) and hit Enter. Wait for a while until the DISKPART program run.

3. Type ‘list disk‘ to view active disks on your computer and hit Enter. There would be seen that the active disks shown as Disk 0 for hard drive and Disk 1 for your USB flashdrive with its total capacity.

4. Type ‘select disk 1‘ to determine that disk 1 would be processed in the next step then hit Enter.

5. Type ‘clean‘ and hit Enter to remove all of data in the drive.

6. Type ‘create partition primary‘ and hit Enter. Creating a primary partition and further recognized by Windows as ‘partition 1‘.

7. Type ‘select partition 1‘ an hit Enter. Choosing the ‘partition 1‘ for setting up it as an active partition.

8. Type ‘active‘ and hit Enter. Activating current partition.

9. Type ‘format fs=ntfs quick‘ and hit Enter. Formatting current partition as NTFS file system quickly.

10. Type ‘exit‘ and hit Enter. Leaving DISKPART program but don’t close the Command Prompt instead.

11. Just copy the files of the windows you wanted to install.


DONE, Enjoy your Bootable USB Drive....

How to remove Hidden Shortcut Virus from Removable Media

If your Pen Drive is infected with any of the following viruses:

* Autorun.inf

* new folder.exe

* Iexplorer.vbs

* Bha.vbs

* nfo.exe

* New_Folder.exe

* ravmon.exe

* RVHost.exe or any other files with extension.


Actually this viruses are hidden and can’t be seen even after you enable show hidden folders.

Following simple dos command will change the attributes of these files ,there after you can remove it by pressing delete key.

Follow these steps:

Step1 : Type cmd in Run

Step2 : Switch to the drive on which pen drive is connected (like C:\> h: enter)

Step3 : type exactly as :

attrib -s -h *.* /s /d

and hit enter (don’t forget spaces).

Now you can see hidden virus files and simply delete them.

How to Hide any Drive Through CMD

Have you ever thought of hiding any drive from your system so that no one can knew about it. 
You may have heard or even used a lot of software’s that might be able to do that, but if you are geek like me and want to do things by your own without using any 3rd party software than this tutorial will show you how you can do it.
Well there are 3 ways of doing it, In this tutorial, we are covering CMD way of doing it.

Here is how to do it:

Step 1 : Open command Prompt, go to Start Menu > All Programs >Accessories > Command prompt
Step 2 : In the Command Prompt, type "diskpart" and hit enter key. If UAC (User Account Control), dialog-box prompts than click Yes.

Step 3 : Then type list volume and press enter, this will produce the list of all drives.


Step 4 : Now select the drive which you want to hide, you can either do this by typing Select Volume 1 (i.e. Volume Number) or by typing Select Volume C(i.e. Drive letter)


Step 5 : To hide a drive, type Remove Letter C. Here, C is the drive letter than you want to hide. You can use any drive letter you want.


Step 6 : That’s it. You are done! C drive is now hidden


How to unhide hidden drive

Step 1 : Follow the procedure mentioned in step 1, 2, 3 and 4.


Step 2 : To show the hidden drive type Assign Letter C and hit enter, now you can view C: drive in explorer.


That’s it. enjoy your privacy…..

How to check if Someone has Hacked in your WiFi

If your internet is slower than usual, then you should check if someone has hacked in your WIFI .In this post I’m going to show you two effective way to check this.

The easiest way is by using free utility called Wireless Network Watcher v1.55 .

1. Download Wireless Network Watcher v1.55.

2. Install it on your PC and start scanning. It scans your wireless network and displays the list of all computers and devices that are currently connected to your network.

For every computer or device that is connected to your network, the following information is displayed: IP address, MAC address, the company that manufactured the network card, and optionally the computer name.


If you want to check if someone has hacked in your WIFI without installing any software then you should log in your router . If anyone is connected to your network it will be shown in your router security settings. You can log into your router, usually http://192.168.1.1 . You can check your router ip address using command prompt
1) Run command prompt (CMD)
2) Type ipconfig and press enter


3. "ipconfig" will list your IP , MAC and default gateway address. You can access to your router settings by typing default gateway address in your web browser.


4. Log in your router and look at the Home Network -> Devices, this shows all IP addresses connected to your network.


By this trick, You can simply manage the Connections on Your WiFi Networks.

DNS HIJACKING: WHAT IS IT AND HOW IT WORKS


DNS hijacking (sometimes referred to as DNS redirection) is a type of malicious attack that overrides a computer’s TCP/IP settings to point it at a rogue DNS server, thereby invalidating the default DNS settings. In other words, when an attacker takes control of a computer to alter its DNS settings, so that it now points to a rogue DNS server, the process is referred to as DNS hijacking.


As we all know, the “Domain Name System (DNS)” is mainly responsible for translating a user friendly domain name such as “google.com” to its corresponding IP address “74.125.235.46″. Having a clear idea of DNS and its working can help you better understand what DNS hijacking is all about.


How DNS Hijacking Works?

As mentioned before, DNS is the one that is responsible for mapping the user friendly domain names to their corresponding IP addresses. This DNS server is owned and maintained by your Internet service provider (ISP) and many other private business organizations. By default, your computer is configured to use the DNS server from the ISP. In some cases, your computer may even be using the DNS services of other reputed organizations such as Google. In this case, you are said to be safe and everything seems to work normally.


But, imagine a situation where a hacker or a malware program gains unauthorized access to your computer and changes the DNS settings, so that your computer now uses one of the rogue DNS servers that is owned and maintained by the hacker. When this happens, the rogue DNS server may translate domain names of desirable websites (such as banks, search engines, social networking sites etc.) to IP addresses of malicious websites. As a result, when you type the URL of a website in the address bar, you may be taken to a fake website instead of the one you are intending for. Sometimes, this can put you in deep trouble!


What are the Dangers of DNS Hijacking?

The dangers of DNS hijacking can vary and depend on the intention behind the attack. Many ISPs such as “OpenDNS” and “Comcast” use DNS hijacking for introducing advertisements or collecting statistics. Even though this can cause no serious damage to the users, it is considered as a violation of RFC standards for DNS responses.

Other dangers of DNS hijacking include the following attacks:

Pharming: This is a kind of attack where a website’s traffic is redirected to another website that is a fake one. For example, when a user tries to visit a social networking website such as Facebook.com he may be redirected to another website that is filled with pop-ups and advertisements. This is often done by hackers in order to generate advertising revenue.

Phishing: This is a kind of attack where users are redirected to a malicious website whose design (look and feel) matches exactly with that of the original one. For example, when a user tries to log in to his bank account, he may be redirected to a malicious website that steals his login details.


How to Prevent DNS Hijacking?

In most cases, attackers make use of malware programs such as a trojan horse to carry out DNS hijacking. These DNS hijacking trojans are often distributed as video and audio codecs, video downloaders, YoTube downloaders or as other free utilities. So, in order to stay protected, it is recommended to stay away from untrusted websites that offer free downloads. The DNSChanger trojan is an example of one such malware that hijacked the DNS settings of over 4 million computers to drive a profit of about 14 million USD through fraudulent advertising revenue.

Also, it is necessary to change the default password of your router, so that it would not be possible for the attacker to modify your router settings using the default password that came with the factory setting.

Installing a good antivirus program and keeping it up-to-date can offer a great deal of protection to your computer against any such attacks.


What if you are already a victim of DNS hijacking?

If you suspect that your computer is infected with a malware program such as DNS Changer, you need not panic. It is fairly simple and easy to recover from the damage caused by such programs. All you have to do is, just verify your current DNS settings to make sure that you are not using any of those DNS IPs that are blacklisted. Otherwise re-configure your DNS settings as per the guidelines of your ISP.

Do you ever Shutdown your PC Properly ? Not sure : Check Now


This trick is actually to enable auto end tasks to the programs that will be either non responding or to end the programs that will cause delay in normal shutdow. 

This can be done by editing your registry keys.

Just follow these steps and and create a new key in your registry. 

You can either go to registry and add these keys manually or just create a reg file by directly copying this file to you notepad. This reg file automatically ends tasks and timeouts that prevent programs from shutting down and clears the Paging File on Exit.

1. Copy the following code into notepad.


[HKEY_LOCAL_MACHINE\SYSTEM\CurrentControlSet\Control\Session Manager\Memory Management]
“ClearPageFileAtShutdown”=dword:00000001

[HKEY_USERS\.DEFAULT\Control Panel\Desktop]
“AutoEndTasks”=”1”

[HKEY_LOCAL_MACHINE\SYSTEM\CurrentControlSet\Control]
“WaitToKillServiceTimeout”=”1000”


2. Save the file as shutdown.reg or *.reg

3. Double click the file to add into your registry. That's it, now you have added this auto end tasks key to your registry.

4. Once you've added this Registry Key, Whenever you Shutdown your PC all the Background running applications will be stopped.

I must prefer this to add, as it helps your PC to run smoothly☺☺

How to make your own Folder Lock Using Notepad

In my previous posts, I have already told you How to Hide Files behind images. In this tutorial, We'll learn a new interesting and useful trick to password protect folder without using any software using Batch File Programming. This trick will work on all Windows platform (Win XP, Win 7, etc). Follow below tutorial to learn this trick.


How to Password Protect any Folder without any Software ??

1. Open Notepad and Copy code given below into it.

cls
@ECHO OFF
title coolhacking-tricks.blogspot.com
if EXIST “Control Panel.{21EC2020-3AEA-1069-A2DD-08002B30309D}” goto UNLOCK
if NOT EXIST MyFolder goto MDMyFolder
:CONFIRM
echo Are you sure to lock this folder? (Y/N)
set/p “cho=>”
if %cho%==Y goto LOCK
if %cho%==y goto LOCK
if %cho%==n goto END
if %cho%==N goto END
echo Invalid choice.
goto CONFIRM
:LOCK
ren MyFolder “Control Panel.{21EC2020-3AEA-1069-A2DD-08002B30309D}”
attrib +h +s “Control Panel.{21EC2020-3AEA-1069-A2DD-08002B30309D}”
echo Folder locked
goto End
:UNLOCK
echo Enter password to Unlock Your Secure Folder
set/p “pass=>”
if NOT %pass%== mikehacks goto FAIL
attrib -h -s “Control Panel.{21EC2020-3AEA-1069-A2DD-08002B30309D}”
ren “Control Panel.{21EC2020-3AEA-1069-A2DD-08002B30309D}” MyFolder
echo Folder Unlocked successfully
goto End
:FAIL
echo Invalid password
goto end
:MDMyFolder
md MyFolder
echo MyFolder created successfully
goto End
:End


2. Save the notepad file as lock.bat (.bat is must)


3. Now double click on lock.bat and a new folder will be created with name MyFolder

4. Copy all your data you want to protect in that New folder

5. Now double click on lock.bat and when the CMD appears, type Y and press enter.

6. Now MyFolder will be hidden from you view, to access that folder double click on lock.bat

7. It will ask for password enter your password and done. (Default password : mikehacks)


To change the password replace "mikehacks" in above Code with your Desired password in the above code


View this Video Tutorial


In future tutorials, I would also inform you to Make an Executable File(Exe). So that, No one can change the password just by editing the .bat file that you've created earlier. Stay tuned with us...