How to send a Spoofed Text Message


Hello everyone, Today I’m going to discuss about How to send spoofed SMS Text message to anyone in the world anonymously.

When I was a kid, I used to prank my friends by sending text messages anonymously. Sending anonymous SMS from a fake number is one of the oldest method to have fun with your friends which is still a brilliant prank idea. Sending SMS anonymously lets you hide your identity as you may send anonymous text messages without registration.

Many people still enjoy sending fake text messages, if you are wondering how to text someone from a fake number then you are at perfect place as today I’m going to share top 7 free [fake] SMS sites that lets you send text from fake number.


Download our Android App Dev Utils


But before I share the free SMS sites list, let me share the steps involved for anonymous texting.

Sending anonymous text message using free SMS sites is quick and easy. All you have to do is follow these simple steps:
  1. First of all, select your preferred fake SMS site from the below provided free anonymous text messaging sites.
  2. Next is to read the rules. It is very important because if you use anonymous SMS sending service for illegal purpose thinking that you’ll be anonymous then I’m sorry ! You’ll be in serious trouble as even if you are anonymous, your IP can be tracked even if you use proxy sites.
  3. Once you got the point that fake SMS texting service is not for anything other than pranking your friends, type the number of friend(s) you want to send fake text.
  4. Next enter your text SMS. This could be anything that you may use to make fun with the fake SMS receiver.
  5. Finally hit Send button ! You may also be asked to fill the captcha before hitting send button. You’ll instantly get success message which marks that the process is complete.

Top 7 Free SMS Sites to Send Anonymous SMS from Fake Number
So here we go with our Free Anonymous SMS provider sites list :
1. TxtEmNow
TxtEmNow is a free way to send anonymous text messages which also supports international numbers. Sending anounymous SMS to any number without registration is simple. You have to just fill the form to send free text messages to your friends.


2. SendAnonymousSMS
Send Anonymous SMS as the name confirms, it is also free site to send a free anonymous SMS text message. It is one of the most trusted and World’s largest free anonymous SMS service provider. It is a web based application using which you may send fake text messages via web.


3. SendAnonymousText
It is also a similar service. In fact, it is just a clone of Send Anonymous SMS as the URL redirects you to the same anonymous SMS provider service as listed above.
4. Textem
If you want to send and receive free text messages including picture messages also then Textem is perfect free SMS site for you. Using Textem, you can send free text messages to any number provided by major cellular services of United States. The best thing is you may also send and receive picture messages for free.


5. TextForFree
Textforfree is another free text messaging service which offers spam free text messaging service. Using this anonymous SMS provider service, you may send SMS to prank your friends to almost any USA cell phone provider. Though you may send fake text to any top cellular phone services provider in USA but messaging is limited to 140 characters only.


6. TxtDrop
TxtDrop is a completely free text messaging service that lets you send fake text to any number without registration. If you are wondering how to text someone from a fake number then visit TxtDrop and within few seconds you’ll be able to do it yourself.


Though you need to provide your email address to get replies securely. The fun part is you may also block your number so that your friends may not prank you using any anonymous SMS service provider.

7. SMS Anonymous [for Australians]
If you want to propose your boy/girl friend and confess something anonymously to someone special and loving friend then this anonymous messaging service is for you. It is completely free. But unfortunately it is only available for Australian numbers.


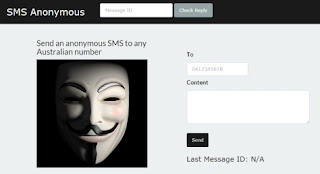
Anyways, if you want to send an anonymous SMS to any Australian number then use this free service to prank your friends with perfect break-up plan. But make sure you don’t hurt someone’s feelings.

The Pro Review from MikeHacks
Though there are many premium anonymous SMS provider services like SMSGlobal who let you send bulk SMS and fake emails anonymously but you need to pay them. Also, there are few other anonymous SMS sites like PimpmySMS and Sharpmail who lets you send fake text message and spoof SMS but I haven’t included them in this list because they require registration before sending fake SMS.

This means, practically they are not anonymous SMS sites. However, you must not forget that using anonymous SMS services for threatening, stalking, fraud activities and other illegal purposes is crime and legal actions may be taken against you if you are found guilty.

If you use anonymous and fake messaging services properly, they may be much more beneficial and life saver than just prank your friends. Want to know how ?
  • Report anonymously to police about crime
  • Report anonymously about smuggling
  • Speak against any social evil anonymously
  • Let your Government know about corrupt political leaders – that too anonymously.

I hope, you got my point !

Disclaimer: MikeHacks never promotes any of the illegal activities, if you use anonymous SMS services for illegal purposes, it is you who would be responsible for it.

Dev Utils : Amazing App for Android Users


Download Now

Manage Apps, Access Hidden Android Settings, Offline Tutorials, and USSD Codes.


Dev Utils is an App for Developers that provides access to in-depth Settings, help you to manage System and Installed Apps, provide latest Tutorials in Offline and Online Mode for tweaks and tricks, and a lot of USSD Codes to make your life easy. All at a single place.

#includes:-

* Manage Apps
- Detailed Description of System and Installed Apps.
- Directly open the App, App Info page in Settings, and the Play Store for respective Apps.
- Directly uninstall the apps.
- Create/Extract and Share apks of All Apps in seconds.
- Search Feature is also provided.

* Hidden Android Settings
- Direct Access to all the Settings page.
- Time Saver as you don't need to keep searching for specific settings in your Phone
- Search Feature is also provided to access specific Settings

* Tips n Tricks
- All the latest Android tweaks and tricks.
- Available in Offline mode.
- Online Tutorials are also available for in-depth discussed steps.

* Chatting feature with Admin and all active users.

* USSD Codes
- All the USSD Codes for Smart Phones.
- Categorised on the basis of :
- Device Manufacturer
- Sim Operators
- Direct call and share feature is also provided for the codes.


Download Now :

Top 5 hidden features you must check out in Android Developer Options

Whenever we have talked anything related to accessing Android using the computer through ADB, we have always asked you to enable Developer Options to enable USB Debugging so that the computer can read your Android device through the ADB bridge. But that’s what we have all stuck to in all our articles and never paid much attention to other options available in the settings. Basically, Developer Options is meant for developers to try different things while developing apps/features on Android, but some of these features are so cool that it’s worth checking them out.


If this is the first time you are exploring Developers Option, chances are that you will not find it in the Android Settings menu. You will have to open the About page in Settings and then tap the Build Number 7 times until you see a notification that the developer options are enabled. You can now access the menu from Android settings.

Now that the Developer Options are enabled, and you have turned them on, let’s talk about the first 5 features that you must check out.

1. Enable Grayscale Display Settings
Using this feature, you can turn your Android’s display monochrome which can be helpful if you are into reading on your android device. In the developers option, find the option Stimulate colour space and tap on it. From the options select Monochromacy and save the settings. Your entire Android experience will now be in monochrome colors.


There are so many ways you can use this feature. Users with AMOLED display on their Androids can turn on the feature when they are serious about conserving power on the device. Reading buffs can also use the feature to reduce eye strain.

Note: Any screenshots taken in this mode will be colored. It’s only the display that changes.

2. Fake GPS Location (Allow Mock Location)
Using this feature, you can use various apps available on the Play Store to fake the GPS location that’s used by other apps on your device. You will find an option that says Allow Mock Location, just tap on it and you are ready to go.


Now download an application called Fake Location Spoofer Free. The app will ask you to set a location on the map and once you have set a location, other apps and services will be using the same location that’s being spoofed by the app. You might have to switch to GPS Only Mode from High Accuracy that uses Wi-Fi as a secondary input source to fetch your location for best results.


3. Tweak Animation Speed
When you navigate on your Android, you will notice that when the screen changes, there are some animations that Android adds for smoothness. It’s like overlapping the two frames so that it doesn’t appear cut off, much like cross-fading in audio and videos. However, these settings are only there for the look and feel and can be disabled to increase overall speed.


Scroll down in the Developers Option and look for Window animation scale, Transition animation scale, and Animator duration scale. Here, lesser the number the faster are the animations. If you don’t care about speed, but want the transactions smoother, simply increase the values.

Cool Tip: Make all the values as 10 and then play the hidden Lollipop game. I am sure you will break all the records.

4. Display CPU Usage on Overlay Screen
Ever wondered how much of the CPU you are using on Android at any given time? There are a few apps on Play Store using which you can get the information, but through Developers Option, the values can be obtained without any apps and that too in real-time.


In the Developer Options, look for Show CPU Usage and check the options. That’s all; you will see an overlay of your current CPU usage on the right side of the screen. You will also get the package name of the apps which are active in the background. The information is just to show off the skills of Developer Options and should be kept disabled to use the phone.

5. Stay Awake while Charging
Many users who have the habit to keep the phone on a charging cradle in office, or on a dock near the bedside can keep the screen awake all the time. Just look for the option Stay Awake and check it to enable the option.


The device will not go to sleep while the phone is charging and can be handy in quite a few scenarios.

Conclusion
That’s just the beginning. There are so many other options to explore in the Android’s Developer Menu. So explore these options and share with us any other features you find useful for other Android users.

How to automate Folder Actions in Windows using Watch4Folder

There are a lot of goodies hidden away among the oft neglected tribe of portable software. Watch 4 Folder is one such gem which you should seriously consider including in your Windows toolkit. Watch 4 Folder is simple intuitive folder monitoring tool that keeps an eye on all your file and folder activities and triggers custom actions depending on the kind of activity in process.

Watch 4 Folder is tiny at 1.3 MB and can be run straight without an installation. The tool runs from the system tray. It’s a freeware that enables you to monitor 12 different types of events and trigger automated actions based on those events.

Here’s a little walkthrough on how you can set it up in three quick steps:


Select a Folder to Monitor
Select the specific folder you want to monitor for any sort of change. It can be a top-level folder like a hard drive partition, or you can optionally pick a sub-folder and other folders within it.

Select the Events to Monitor
Select the event. Let’s say you want to start some process as soon as new media gets added to a folder. You can place a checkmark on Media Insert.

Be specific with the event you want to select because sometimes a single event can create several Monitoring events, for example selecting File Change event and File Rename event will create two events in case of file rename, because the file was renamed but also changed.

Select the Actions to be Triggered
As the screen above shows, you can pick from several actions. For instance, you can log all changes to a Notepad file. You can set the path of a graphics editor (that will be triggered to open) for a Media Insert event. You can set up desktop alerts that will display notifications when a particular event occurs.

You can also perform dynamic actions on changed files. The changed filename can be passed on to the executing program as an argument. For example if a file was changed you can trigger notepad to auto open the changed file. The Watch 4 Folder help file has a detailed explanation on how you can use specific arguments from the dropdown list.


Watch 4 Folder has a live log you can view to see the event-action process as it happens.

Overall, this is an automation software that can significantly boost your productivity if you set it right. Run it and let us know if it helps you in shaving off a few minutes.

How to always run a Program as an Administrator in Windows

Security experts often advice users to use the account with lower privilege in order to prevent system from malware attacks and other risks. The Administrator account with highest privileges, which can control over the entire system, should be used only when necessary.

In Windows, you’ll find that by default most of the programs run in the standard mode (even if you are using the admin user profile). But there are programs (like the Windows 7 DreamScene Activator) that need to be started in the administrator mode for them to function properly. Also, at times, even common applications like the Notepad need to be run as administrator.


So how do you run a program as an administrator? Well, just right click the program and choose “Run as administrator” in context menu. Better, you can use the keyboard shortcut trick to do it.

But it may be a little inconvenience to go through the same steps again and again, especially if the program is meant to be run in the admin mode all the time. Keeping that in mind, here are two solutions.

1. Enable the Administrator account
Yes, you can enable system built-in Administrator account, which was hidden by default (this is a risky method by the way..read on to know why).

Type “cmd” in the Windows search bar, and then right click on the “cmd” item, select “Run as administrator”.


Enter the following command into it:
net user administrator /active:yes

Command Prompt will return the execution result, which should be:
The command completed successfully.


Now you can migrate your personal data from current user profile to the new one, and launch any program as administrator.

Important: The above method is equivalent to turning off UAC as well as other system protection features. Hence, if you aren’t someone who’s been playing with computers since childhood and knows what he is doing, following the next method suggested.
2. Create Shortcut With Admin Privileges
A better solution is to create a shortcut that has administrator privileges. This could be done for specific applications which need to be run as administrator frequently.

Right click the program icon present on your desktop, taskbar, start menu or any other location.


Go to the properties, and then switch to “Shortcut” tab, and there you will find a button labeled “Advanced” Click on it.


Check the “Run as administrator” box, and then press OK.


From now on, this shortcut icon will run the program with administrator’s privileges all the time.

Note: Again, before going ahead and enabling this for a program, make sure the it is safe enough.

How to create a Dummy File in Linux

Ever needed to quickly test upload/download speeds to and from your Linux web server? Create a dummy file in Linux of a fixed size for this exact purpose and get a real world connection test without any advanced software needed. When running a Linux server, the dd command(convert and copy a file) can be used for exactly this purpose, and it’s a pretty simple process.
To create a dummy file in Linux of 50MB, we first need to convert the file size into bytes (1024 x 1024 x 50 = 52428800) and then enter the following at the command prompt:
dd if=/dev/zero of=yourfilename.test bs=52428800 count=1
*change “yourfilename” to whatever you wish to call the file.
The file will then be created within the folder that you are currently in and the following output will be displayed upon successful creation(time and write speed details will obviously vary slightly):
1+0 records in
1+0 records out
5242880 bytes (50 MB) copied, 0.312 s, 33.6 MB/s
If you want to confirm the file’s creation and size details, just enter the following:
ls -lrth yourfilename.test
and then you should get an output that looks similar to below:
-rw-r–r– 1 root root 50M Jan 1 00:00 yourfilename.test
A breakdown of the command elements can be found here.

How to add any Application to the Windows Desktop Right-Click Menu

If you want really quick access to launch a frequently used application without putting extra icons on your desktop, you can add that application to the context menu for the desktop with a simple registry hack. Here’s how to do it.

Adding Applications to the Desktop Context Menu
For today’s lesson we’ll show you how to add Notepad to the menu, but you could add any applications you want instead. The first thing you’ll want to do is open up regedit.exe through the Start Menu search or run box, and then browse down to the following key:

HKEY_CLASSES_ROOT\Directory\Background\shell


The screen should look similar to this one if you are in the right place.

Next, you’ll want to create a new key underneath the shell key, the name of which is exactly what is going to show up on the desktop menu. Right-click on the “shell” key, and then choose New \ Key from the menu.


Give the new key the name that you want to show up on the desktop context menu. For this example we’ll be using Notepad.


Optional: If you want to assign an “Alt” key to this menu entry for quicker access, you can change the (Default) value on the right and put an & character in front of the key you want to use. For instance, if you wanted to be able to just use the N key to launch Notepad once the desktop context menu pops up, you can do this:


Personally I don’t find this terribly useful since you have to use the mouse to right-click on the desktop… may as well just use the mouse to click the item. Still, for completeness I’ve included it.

Next you’ll need to create the command key that will actually hold the command used to launch the application. Right-click on the new Notepad key, and then choose New \ Key from the menu.


Give this key the name “command” in lowercase.


To complete this step you’ll need the full path to the application that you want to launch. You can use Shift + Right-Click to get the Copy as Path menu item to find this more quickly. 
Note: of course, for Notepad you wouldn’t need the full path, but this is just an example.


Now click on “command” on the left side, and then double-click on the (Default) key in the right side to edit the string value.


Paste in the full path to the executable that you got from the “Copy as Path” step above, or you can put in the full path yourself if you’d like.

Once it’s done, it should look like this:


And right-clicking on the desktop will produce the new menu item… naturally, using this menu item should launch Notepad.


You can add as many applications to the desktop context menu as you’d like, just repeat the steps again with a new menu item name and command.

Enjoy!!!!!!

Create Task Reminders using Windows Task Scheduler instead of Third Party Tools


There’s no dearth of task reminder tools and applications that one could use to keep a tab on his to-do list. So much so that one doesn’t care to look into the default Windows features or tools to see if there’s something like that available.

At work I always prefer to use MS Outlook as it allows me to set up the task reminders too. But if you aren’t using it for emails, it probably won’t make a lot of sense to use this heavy tool just for task reminders. In such cases I would suggest you use the Windows Task Scheduler rather than opting for a third party tool for setting up reminders.

Here’s how to schedule a reminder using the same.

Steps to Create Task Reminder Using Task Scheduler
Windows Task Scheduler is an integral part of the operating system and it can be used to accomplish many tasks like software updates, system shutdown/wakeup, disk cleanups, system maintenance, etc. Task reminder is one of the simplest uses one can put it to.

Step 1: Launch the Task Scheduler. You can do that by going to Start Menu, searching for task scheduler and then hitting Enter.


Step 2: On the Task Scheduler window the right pane is labeled as Actions. Click on the option to Create Task.


Step 3: On the next dialog, go to General tab. Give your task a Name so that you can identify it among other if when you decide to make some changes later.


Step 4: Next, switch the context to Triggers tab. Click on the New button on the bottom left of the window to define trigger details.


Step 5: For the trigger, set a start date and time, choose the recurrence behavior and define advanced settings if any. Click on Ok when done.


Step 6: Back on the Create Task window, switch to the Actions tab and create a New action.


Step 7: Choose whether you want to Display a message or Send an email. I chose the former because that shows a pop up on top of whatever you may be doing when the reminder is triggered. Fill the Title and the Message text boxes and hit on Ok.


Note: If you want you can create multiple triggers and define multiple actions for a single task.


With that done you can close all the windows that have been stacked. And then you can forget about the task. Your system will take care of reminding it to you.


Conclusion
While I said that I use MS Outlook at work, I have been using the Task Scheduler at home. It works seamlessly, is simple to set up and does not add to the load of my machine. Don’t you think you should also retire the third-party tools that you have been using for this (and if you are not using your smartphone for it)?