
WinDirStat can help you isolate such large files so that the cleanup becomes easier. Let’s dig into the features of this software and how it works.
Using WinDirStat

In the tree map, each block represents a file on your computer and the size of the block is directly proportional to the amount of space the file takes up on the hard drive when compared to other files. The partitions in the rectangle represent sub-directories and files. There’s an option to zoom in/out of the tree structure using the option available in the Treemap menu.
Using the tool I was able to find an old backup of my Android phone that was taking up around a GB on my computer, which I didn’t need.
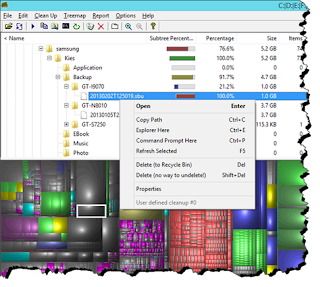
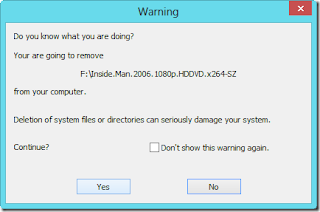
The file can be deleted by using the option that’s available in the right-click context menu. You can also copy the path of the file to your clipboard or open Windows Explorer. While deleting the file there’s an option to either permanently delete it or send it to recycle bin for further review. There are some additional configuration options you can explore from Option -> Configure WinDirStat.
So that was how you can use WinDirStat to reclaim large amounts of disk space on your computer.
WinDirStat is a free app for Windows that’s published under General Public License. The program is very small in size and installation is straightforward. Simply follow the on-screen instructions and complete the setup. While installing you can choose some additional language packs if needed.
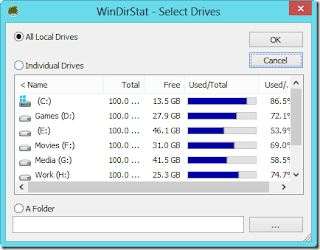
Once you launch the program, it will ask if you would like to scan all the drives that are on your computer or narrow the search to just a single drive or a folder. After you have made the selection, click on the OK button.
The program will then start the initial scan which might take some time depending upon your selection and hard disk space. For me it took around 6 minutes for a full scan of 750 GB hard drive. Once the initial scan is complete, the tool will display all the files in a tree structure along with the file extension graph which sums up the total amount of disk space used on the computer.
Once you launch the program, it will ask if you would like to scan all the drives that are on your computer or narrow the search to just a single drive or a folder. After you have made the selection, click on the OK button.

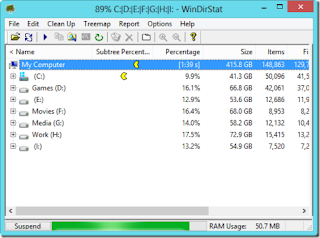
The program will then start the initial scan which might take some time depending upon your selection and hard disk space. For me it took around 6 minutes for a full scan of 750 GB hard drive. Once the initial scan is complete, the tool will display all the files in a tree structure along with the file extension graph which sums up the total amount of disk space used on the computer.


In the tree map, each block represents a file on your computer and the size of the block is directly proportional to the amount of space the file takes up on the hard drive when compared to other files. The partitions in the rectangle represent sub-directories and files. There’s an option to zoom in/out of the tree structure using the option available in the Treemap menu.
Using the tool I was able to find an old backup of my Android phone that was taking up around a GB on my computer, which I didn’t need.

The file can be deleted by using the option that’s available in the right-click context menu. You can also copy the path of the file to your clipboard or open Windows Explorer. While deleting the file there’s an option to either permanently delete it or send it to recycle bin for further review. There are some additional configuration options you can explore from Option -> Configure WinDirStat.

So that was how you can use WinDirStat to reclaim large amounts of disk space on your computer.


